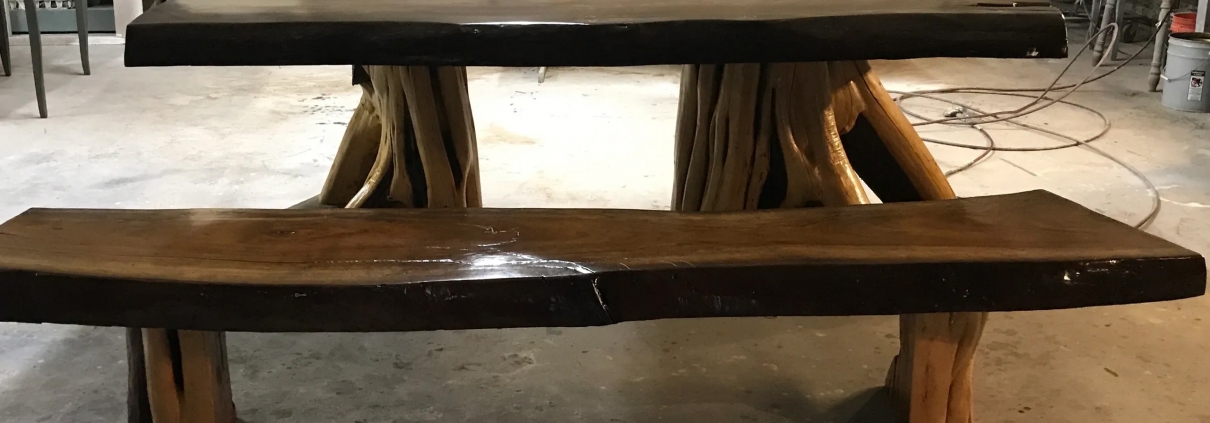
Pieces of Wood

Introduction

Wood furnishings add a touch of elegance to any room. However, it can become scratched, dented, and damaged with time. Repairing broken timber fixtures may appear difficult, but with the right equipment and tactics, you can restore them to their previous glory. This booklet will walk you through the process of repairing and refinishing your wooden furniture, ensuring it looks as good as new.

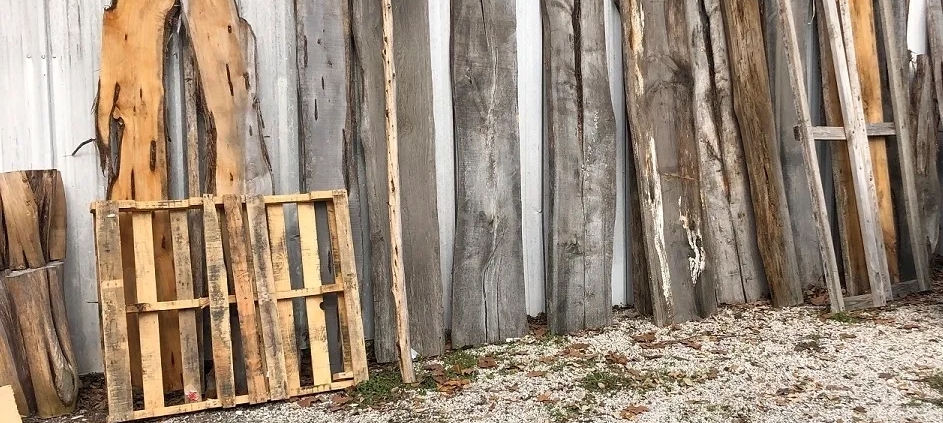
Tools and Materials Needed

Before beginning the restoration technique, gather all vital tools and substances. You’ll need sandpaper, wooden filler, wood stain, a putty knife, smooth cloths, and a sealant. Having those gadgets handy will make the manner smoother and more efficient. Additionally, don’t forget the use protective gloves and safety glasses to shield yourself for the duration of the restore.

Preparing the Furniture

Proper education is fundamental to a successful restoration.

Cleaning and Sanding

Begin employing cleaning the fixtures to dispose of any dust or debris. Use a moderate cleaning soap and water solution, and dry very well. Next, sand the floor to create a smooth base for upkeep. Use medium-grit sandpaper to do away with the vintage end and any minor imperfections. Once the sanding is whole, wipe down the fixtures with a clean, damp fabric to dispose of dirt.

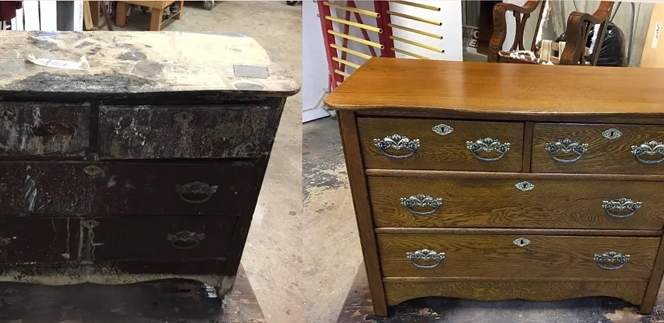
Repairing Surface Damage

Surface damage, along with scratches and dents, is not unusual in timber fixtures.

Fixing Scratches and Dents

To repair scratches, use a timber filler that fits the shade of your fixtures. Apply the filler with a putty knife, pressing it into the scratch. Allow it to dry, then sand the location smooth. For dents, a humid fabric and an iron can work wonders. Place the damp cloth over the dent and apply the iron on a pinnacle. The warmth will cause the wood to amplify and fill within the dent.

Repairing Cracks and Splits

Cracks and splits require a special technique. Use timber glue to fill within the crack, then clamp the pieces collectively till the glue dries. For large splits, consider using a timber filler or epoxy resin for brought energy. Once the restoration is dry, sand the area clean to put it together for refinishing.

Refinishing Techniques

Refinishing your fixtures gives it a sparkling, new look.

Applying Wood Stain

Choose a wooden stain that fits your furniture’s authentic color. Apply the stain with a clean fabric, operating within the course of the wooden grain. Allow the stain to penetrate for a couple of minutes, then wipe off any extra with a smooth material. Repeat the manner if a darker shade is favored. Ensure the stain is lightly implemented to avoid blotchy areas.

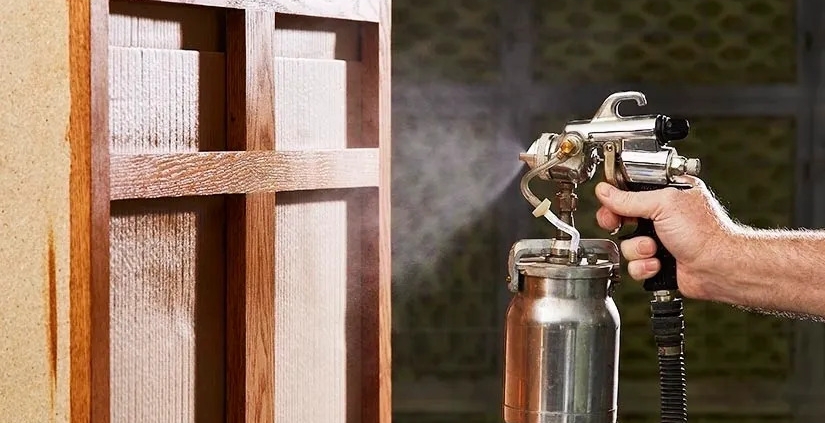
Sealing and Protecting the Finish

Once the stain is dry, it’s time to seal and shield the finish. Apply a clean sealant, which includes polyurethane, to protect the wood from any harm. Use a brush or a spray can for excellent utility. Allow the sealant to dry absolutely, then gently sand the surface with first-rate-grit sandpaper. Apply a second coat if vital for added sturdiness.

Final Touches and Maintenance

After refinishing, upload the final touches and learn how to maintain your furnishings.

Polishing and Buffing

Polishing and buffing supply your furniture with an expert finish. Use an amazing fixture polish and a tender cloth to buff the surface. This will enhance the timber’s natural shine and provide a shielding layer. Buff in circular motions for the best effects, being attentive to edges and corners.

Regular Maintenance Tips

Maintaining your wood furnishings ensures its durability. Regular dusting and sharpening will preserve it searching its pleasant. Avoid placing furnishings in direct sunlight to prevent fading. Use coasters and placemats to guard the floor from spills and scratches. Periodically test for signs and symptoms of damage and deal with them promptly to keep away from large upkeep.

Conclusion

Repairing and refinishing broken timber furniture may be a rewarding DIY assignment. You can repair your furniture to its former glory with the proper tools, substances, and strategies. Follow this step-by-step manual to gain professional-searching outcomes and revel in your superbly restored wooden furnishings for years.

FAQS

1. Can I repair deep scratches on my wooden furnishings myself?

Yes, you may restore deep scratches on timber fixtures by using the use of a wooden filler that fits the color of your fixtures. Apply the filler with a putty knife, and let it dry, after which sand it smooth earlier than refinishing.

2. What is the excellent way to dispose of dents from wooden furnishings?

To remove dents, region a humid fabric over the dent and practice a warm iron on top. The warmth and moisture will cause the timber to expand and fill in the dent, restoring the floor.

3. How do I choose the right wood stain for my fixtures?

Choose a wood stain that suits the original coloration of your fixtures or the preferred new shade. Test the stain on a hidden area first to make certain it suits nicely and observe it calmly with a smooth fabric or brush.

4. Is it important to apply a sealant after staining timber furniture?

Yes, the use of a sealant after staining is essential to protect the wood from destiny damage and to keep the finish. A clean polyurethane sealant is a great option for most timber fixtures.

5. How often must I maintain and polish my timber fixtures?

Regular upkeep, such as dusting and sharpening, have to be carried out every few weeks. Use an outstanding furnishings polish and a soft fabric to hold the floor searching its first-rate and to guard it from harm.

Furniture Made Up Of Wood

Introduction

Furniture repair and refinishing can rework your antique, tired portions into stunning, like-new objects. Whether you’re trying to restore minor scratches or undertake a complete refinishing mission, understanding the right techniques and substances is essential. This guide will walk you through the system step-by-step, ensuring your fixtures look excellent.

Understanding Furniture Damage

Types of Damage

Furniture can be afflicted by various varieties of harm, consisting of scratches, dents, watermarks, and damaged elements. Scratches and dents are common, specifically in timber furniture, and can regularly be repaired with easy techniques. Watermarks arise whilst moisture penetrates the finish, leaving a cloudy spot. Broken elements, consisting of legs or joints, require more significant upkeep and might need professional intervention.

Assessing Damage

Before starting any restored paintings, thoroughly examine the harm. Look for surface-degree issues like scratches and dents, and deeper issues along with structural weaknesses. Identifying the extent of the harm will help you determine the first-rate restoration technique and whether you want extra equipment or substances. Documenting the damage with pix can also be beneficial as a reference for the duration of the restoration procedure.

Essential Tools and Materials

Basic Tools

To effectively restore and refinish furniture, you may need a hard and fast of simple equipment. Essential gear encompasses sandpaper, screwdrivers, clamps, timber glue, putty knives, and a hammer. Sandpaper is important for smoothing surfaces and eliminating vintage finishes. Screwdrivers and hammers are essential for tightening or replacing hardware. Clamps help preserve elements together at the same time as the glue dries.

Materials Needed

In addition to gear, collect the vital materials. These include wood filler, stain, varnish, paint, and chemical strippers. Wood filler is used to fill in scratches and dents. Stain and polish restore the wood’s color and protect it from destiny harm. Paint can deliver furniture a new appearance. Chemical strippers are critical for removing antique finishes thoroughly and efficaciously.

Step-by-Step Guide to Furniture Repair

Cleaning and Preparation

Before starting any restoration work, smooth the fixtures very well. Use a mild detergent and water to remove dust and filth. For stubborn stains, a mixture of vinegar and water may be powerful. Allow the furnishings to dry absolutely. Once easy, sand the floor gently to do away with any end and create an easy base for repairs. This step is essential for ensuring that new finishes adhere well.

Fixing Scratches and Dents

To restore scratches, use a timber filler or putty that suits the coloration of your furniture. Apply the filler to the scratch and ease it out with a putty knife. Once dry, sand the region gently to combine it with the encircling surface. For dents, dampen a material and place it over the dent. Use a warm iron over the fabric to steam the timber, which could help boost the dent. Repeat as necessary until the dent is less visible.

Repairing Broken Parts

For damaged parts, which include legs or joints, use timber glue to bond the portions collectively. Apply glue to the damaged surfaces and clamp them tightly till the glue dries. For large breaks, consider the usage of screws or dowels for brought power. If a piece is simply too broken to restore, you would possibly need to update it completely. Ensure all repairs are strong and steady earlier than intending to refinish.

Professional Furniture Refinishing Techniques

Stripping Old Finish

Stripping the antique finish is step one in refinishing furnishings. Use a chemical stripper consistent with the manufacturer’s commands. Apply the stripper with a broom and let it take a seat for the endorsed time. Once the antique end starts to bubble, use a putty knife to scrape it off. Be positive to work in a properly ventilated vicinity and wear shielding gloves and eyewear.

Sanding the Surface

After stripping the vintage end, and the furnishings to put off any remaining residue and clean the floor. Start with coarse-grit sandpaper and regularly move to finer grits. Sand alongside the grain of the timber to keep away from scratches. This step is essential for creating a clean, even surface to take in the new finish uniformly. Wipe away dust with a tack fabric among sanding tiers.

Applying New Finish

Choose a finish that enhances your furnishings and observe it in keeping with the product’s commands. Common finishes include stain, varnish, and paint. For stains, practice with a brush or fabric, and wipe off extra with an easy fabric. Allow it to dry completely before applying a clear varnish for safety. If the use of paint, observe thin, even coats and let each coat dry before adding another. Sand gently among coats for a clean end.

Tips for Maintaining Refinished Furniture

Regular Cleaning

Maintain your refinished fixtures using cleaning them frequently. Dust regularly with a tender cloth to save you from dirt buildup. Use a mild cleaning soap and water solution for deeper cleansing, and dry the surface right now to avoid water harm. Avoid harsh chemicals or abrasive cleaners that can harm the finish.

Preventing Damage

Protect your refinished furnishings by setting them away from direct sunlight and heat sources, which can cause fading and cracking. Use coasters, placemats, and tablecloths to prevent scratches and stains. Apply felt pads to the bottoms of items located at the fixtures to avoid scratching the floor. Regularly investigate the furniture for any signs of damage and cope with them right away.

Conclusion

Repairing and refinishing furniture may be a profitable DIY challenge. With the right equipment, materials, and techniques, you may transform old, damaged pieces into beautiful, useful objects. Follow this manual to attain professional-pleasant outcomes and experience your refinished furnishings for years yet to come.

FAQS

Q1: What is the quality way to get rid of scratches from wooden furnishings?

The first-class manner to put off scratches from timber fixtures is to use a timber filler or putty that suits the color of the timber. Apply the filler to the scratch, ease it out with a putty knife, and sand lightly as soon as dry to blend with the encircling surface.

Q2: Can I refinish fixtures without stripping the vintage finish?

While it’s far feasible to refinish fixtures without stripping the antique end, it is normally recommended to cast off the vintage finish for the great consequences. Stripping ensures a clean, even surface to absorb the brand-new finish uniformly.

Q3: What equipment do I need for fundamental fixtures restoration?

Basic gear for fixture repair encompasses sandpaper, screwdrivers, clamps, wood glue, putty knives, and a hammer. These equipment are critical for cleansing, repairing scratches and dents, and fixing damaged elements.

Q4: How regularly should I clean my refinished furniture?

Regular dusting with a soft material ought to be carried out often. For deeper cleansing, use a slight cleaning soap and water solution as wanted, however, make certain the surface is dried without delay to prevent water damage. Avoid harsh chemical substances or abrasive cleaners.

Q5: What are a few guidelines for stopping damage to refinished furniture?

To save you harm, preserve refinished furniture far from direct sunlight and warmth assets. Use coasters, placemats, and tablecloths to shield surfaces. Apply felt pads to gadgets positioned on the furnishings and regularly look at them for put on and cope with issues right away.

Water/Flood Damage

We can all get exhausted by the way our furniture looks. After all, these pieces are not merely decor but the building blocks of what you see when entering a space. So, when their shine, inevitably, starts fading away- it is an important decision to refurnish your furniture. Although, for individuals embarking on this journey for the first time, it can seem daunting. There are certainly a few factors to keep in mind before beginning this procedure. Also, being adequately prepared will allow you to know the price range acceptable for the venture.


There are a few things to note when assessing the price tag most appropriate for your needs. However, you should understand the benefits and potential drawbacks of this process a bit further to make a holistic decision. In this article, we will be guiding you along these pointers.


The Quality Of Service Provided.

Although this may seem like a no-brainer, it is important to emphasize it nonetheless. The fluctuation of prices offered by different companies will reflect their expertise. Furniture repair as a whole is a vast industry. As such, you will be greeted with a variety of options to choose from and you must be specific in requesting your wishes. From there, it can be a far easier venture to compare and contrast agencies and their quality of work. You may also reach out to prior reviewers of specific companies and ask them to share the price ranges they were offered. It is better to be safe than sorry; walking blindly into a deal with an agency who are merely looking for a cash grab.


Also, specifying a price range for yourself can help guide your conversations about your ideas on affordable furniture refinishing. Your ability to be direct during these talks will allow you to understand the value a company is placing on being cost-effective. If their attitude towards your statements is reserved you should pile that under “suspicious/shady behavior.”


Take Note Of The Furniture Itself.

The punishment will fit the crime, and in this case, the price tag will be reflective of the furniture you need refinished. The conversation of cost around refinishing furniture ideas will always start from the subject of the job. Specifically speaking, this pertains to the size of the furniture, the severity of the task required, and if there is a deadline by which it must be refinished. Also, as priced by Furniture Refinishing, a bed is one of the most costly pieces. a qualified agency will refinish. This is because most antique beds have intricate details engraved into their headboard, possible posters, etc. As such, reliable companies, such as the one mentioned, will take their time to complete the task with attention to detail.


Also, similarly, when dealing with old furniture, prices can increase if there is a need to bring special finishing material to protect the original material. For example, refinishing china cabinets can lead to a dent in your wallets because they are notoriously antique. Restoring their aesthetics to their former glory is a more complicated task than it may seem. Alternatively, keep note that, refinishing a simple dinner table should not cost you an arm and a leg. If that is gearing up to be the scenario, you should keep looking for an agency that can provide you with the best paint for refinishing furniture… At a reasonable cost!


Opting For Modern Finishing Options Does Require Some Investment.

Now, while it is important to take the appropriate time and research for cost-effective options, choosing a modern finishing material will require a higher price. This can, usually, apply to options such as high-gloss finishing, colored lacquers, and modern takes on wood staining. Of course, each company will have differing prices. A good estimate someone can get is from the price tags attached to services provided by Furniture Refinishing. Companies like these, which provide a variety of options with flexible cost ranges, can help you understand the market costs available. Of course, these must be further explored in the category of your needs.


Therefore, you must give yourself the appropriate time to find the various types and benefits of refinishing furniture today and whether such investments will be worthwhile. If the answer is “Yes,” then you can take that as your sign to look deeper into it. However, if you find yourself hesitating about any matter- including your current financial position- take a step back and reconsider.


Final Thoughts.

You should not feel like paying a large sum for refinishing your furniture is inevitable. Although this task can lead to wonderfully altering results, there are always ways to make it more affordable. Wherever possible, dive into research about what companies and resources are available near you. Know the worth of your furniture and the memories that it holds but, do not go blindly into business with an inadequate agency.

Furniture Finishing Service

Refinishing furniture is a rewarding and engaging task. Not only does it restore the beauty of the piece, but can also help extend the lifespan. Refinishing is a broad term as it involves multiple things, you can change its finish, its color, repairs, and more.

In this article, we will explore when to refinish furniture, the tools, and materials, steps to refinishing, professional help or DIY, and wrap it up with a conclusion.

When to refinish furniture?

The first step to decide is whether you need to refinish the furniture. As sometimes stripping the finish is not always necessary rather you can use a wood conditioner and it will give you the results you are looking for.

Below are a few steps that indicate that you need a refinish:

  • Noticeable marks that do not go away with cleaning the furniture
  • The surface is sticky even after being cleaned
  • Worn-out patches and blemishes
  • The color has changed to very dark or yellowish
  • Starting to flake and chip off

The tools and materials required

Tools

  • Safety glasses
  • Sandpaper
  • Putty knife
  • Work gloves
  • Cleaning cloths and towels
  • Power sander

Materials

  • Paint stripper
  • Wood filler
  • Wood oil
  • Paints or stains
  • Furniture wax
  • Steps to refinish furniture

    Clean the furniture

    Before you start stripping off any finish it is best to use a cleaning cloth and clean the furniture. Remove any dirt or debris that might be stuck to the furniture pieces.

     Remove the finish

    You are at one of the most time-consuming parts.

    This step is for wooden furniture usually. Remove the paint, varnish, or wood stains by sanding them or using chemical strippers. Sometimes hot guns can also be used to scrape the wood off.  

    Prepare the piece

    Finally, you can take a little break. 

    After stripping down the finish let it dry and settle.  

    Fill the grains

    This step is carried out with wood pieces some types of wood require filling to smoothen out the finish. Grain filler will help you complete this job as it is a pigmented paste that comes in a range of colors, choose the option that will suit your piece the best.

    This comes down to a personal choice.

    Painting allows you customization and creativity.

    After you have stripped off the current finish, let it dry. Apply the new coat of stain and paint.

    There is a wide variety of stains and paints. One can be oil-based paints, water-based stains, and gel stains. Apply the paint evenly and work slowly through the process. The thinner the layer the more precise the look would be.

Sealing and finishing

As the name suggests it is time to seal in. 

After you are done staining and painting it would be best to apply a sealant. The sealant acts like a protective barrier that helps prevent moisture, stains, and damage. The sealing comes in a variety of choices such as lacquer, oil, wax, shellac, polyurethane, and varnish. These sealants also have different properties, like polyurethane lasts the longest.  

Allow the sealants to soak into the furniture for a while and then wipe it off.

Reassembling and final touches

Now that you think your furniture has been nicely finished. It is time to put the furniture back in its original form if you disassembled parts, it is time to put them back.

Final touches would consist of adding some decorative elements to the piece to give a beautiful outlook. 

DIY or professional help?

Most furniture refinishing can be done yourself. All you need is a set of tools and materials and a very basic skill set that you can learn online or practice. However, some pieces might be precious and unique and might require professional help as experimenting might not suit them and can be costly.

If you want to decide whether to do it yourself or get professional help, ask yourself the following questions to make your decision easy.

Am I dealing with antique pieces?

Antique pieces are usually timeless pieces that have sentimental values and emotional attachments. Sometimes refinishing them requires a specific skill set as a lot of materials and finishes back in the day cannot be found in the current era. Consultations with antique specialists will be your viable solution for antique furniture restoration. As it will ensure the job is done responsibly and properly while preserving the value of the piece. 

Is the piece stable?

Yes, this might sound a bit odd but it is true.

If the pieces have to be reglued and are taken apart then it would require professional supervision as they are well-versed and competent and know exactly how to tackle such matters.

What is my space like?

Do I have the right space is one of the key questions to carrying out this process.

 Since refinishing requires you to work with chemicals and heat guns you need to ensure that you are well-equipped and you have a comfortable space to carry out the process without damaging other things around you. As with sanding a lot of dust comes and with chemicals you need good ventilation so you are not inhaling the hazardous fumes.

Final thoughts

Furniture refinishing is one of the ways where you can give a new look to your existing furniture. Not only that but antiques can also be preserved by consulting the antique specialists. Furniture refinishing requires tools and a basic skill set. Sometimes refinishing is not that important you can use wood cleaners and conditioners to achieve a clean look. If you think there are stubborn marks that do not go away with it and the piece is changing color then it would be best to carry out the refinishing steps, which involves removing the current finishes and then letting it rest and painting or staining with new to achieve that timeless appeal.